Policies
Hub provides the capability to perform actions to data via Policies.
Policies comprise criteria, conditions and triggers which are applied to data within one or more Spaces residing on a Site.
Viewing Policies
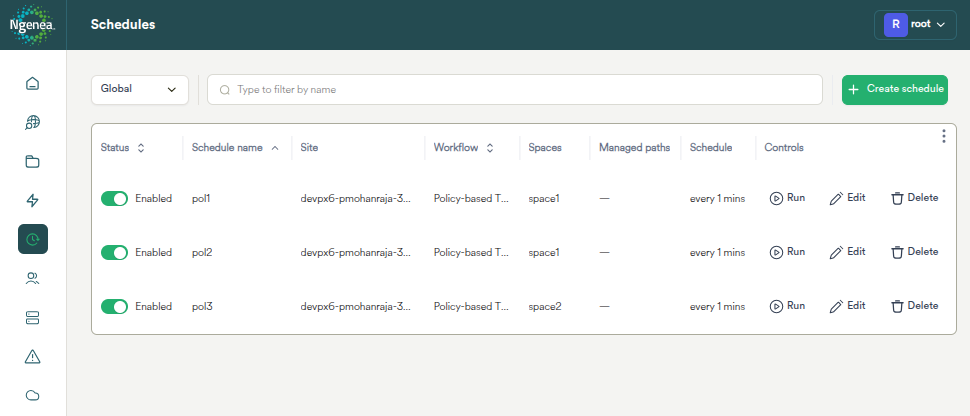
To view available Policies, click the Schedules menu button.

|
Navigates to the Schedules screen |
Policies are displayed alongside other workflow schedules on the Schedules page.
Policy Types
There are two policy workflow types:
Policy-based Tiering
Automatically moves data between storage tiers within a site based on rules like file age, access time, or pool capacity thresholds. Use it to keep high-performance storage free by migrating cold data to cheaper tiers, with transparent recall when files are accessed again.
Iris Metadata Policy
Drives data movement decisions using Iris metadata (e.g. content tags, media properties) rather than filesystem attributes alone. Use it when you need to tier or archive files based on what the content is rather than when it was last accessed.
Note
You must be logged in via Iris Single Sign On (SSO) to select the Iris Metadata Policy workflow type, otherwise the option will be greyed out.
Adding a Policy
Click the Create Schedule button to display a dialog to configure a Schedule.

Important
This function can only be performed by a Hub Administrator
Creating a Schedule Wizard
Navigating the Wizard

|
Click the close button to exit the wizard. Changes are not saved. |

|
Click the Next button to advance to the next page of the wizard. The Next button is disabled until all required page elements are completed. |

|
Click the Go Back button to return to the previous wizard page. |

|
Click the Finish & Create button to apply the changes displayed on the wizard summary page. |
Workflow
Policy-based Tiering
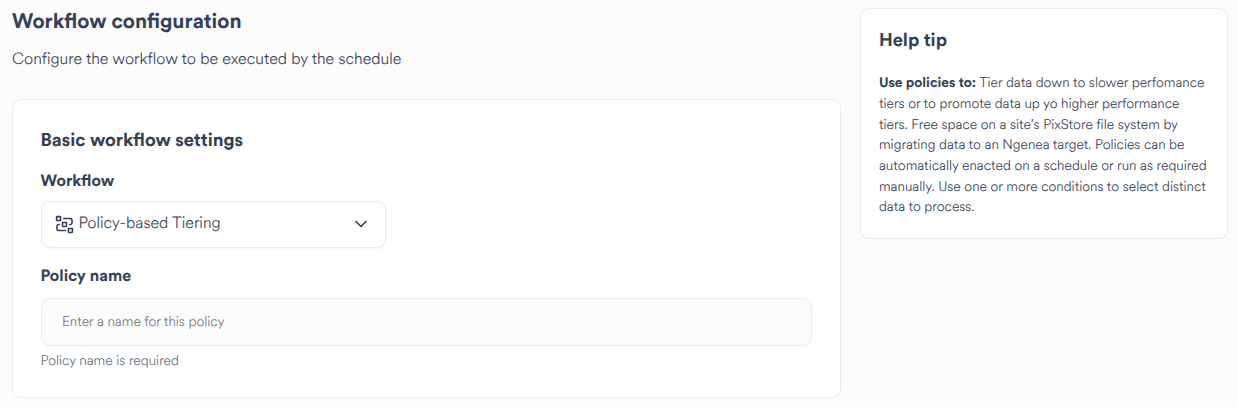
Set the Workflow type to “Policy-based Tiering”
Provide a descriptive name for the Policy
Iris Metadata Policy
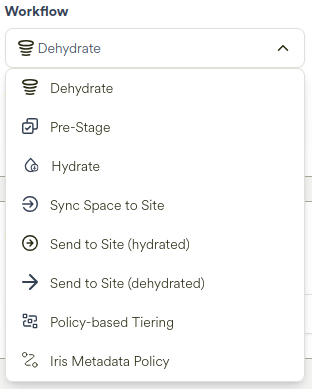
Iris Metadata Policies enable the generation of candidate datasets for data movement. This is achieved by leveraging metadata extracted by Iris, allowing policies to be defined in a flexible and business-aware manner.
Set the Workflow type to “Iris Metadata Policy”
Provide a descriptive name for the Policy
Scope
Policy-based Tiering
The same Policy can run against one or more Spaces concurrently for a Site.
Policies are specific to a Site.
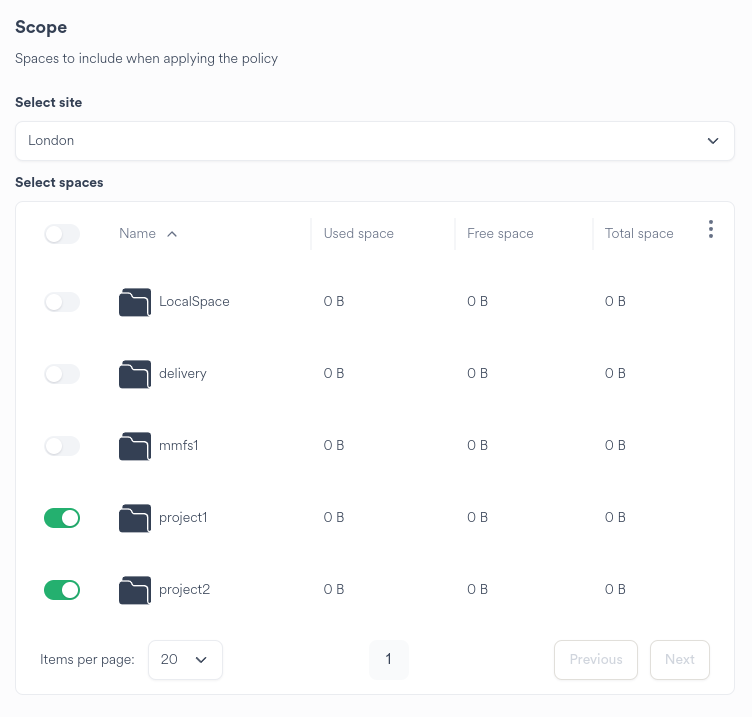
Select the Space or Spaces to run the Policy against on the Site
Iris Metadata Policy
Iris Metadata Policies can only be run on:
Iris enabled Sites
Iris enabled Spaces on the selected Iris enabled Site
Only one Iris enabled space can be processed by an Iris metadata policy.
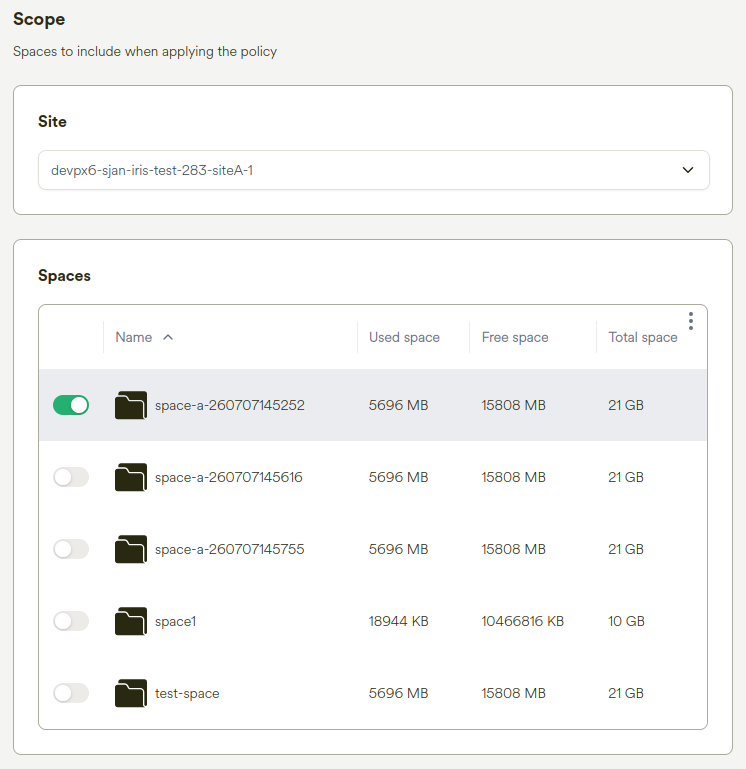
Select the Iris enabled Space to run the Policy against on the Iris enabled Site
Iris Search Query
The Query Builder is a visual interface component designed to simplify the construction of metadata queries.
This policy wizard step is only presented for Iris Metadata Policy workflows.
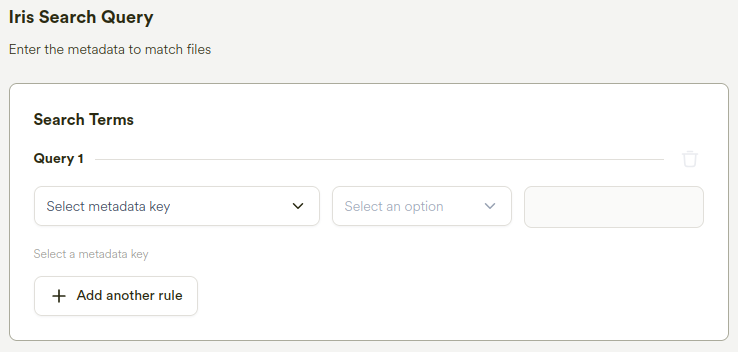
It supports multiple data types, including:
Text
Keyword
Boolean
Long
Float
Date
This enables users to build structured and precise queries without needing to write raw query syntax.
Pool triggers
Setup a pool trigger to define the flow of data.
Examples of supported data flows are:
Pool to Ngenea
Data in pool sas1 is dehydrated to an Ngenea Target according to the Policy conditions.
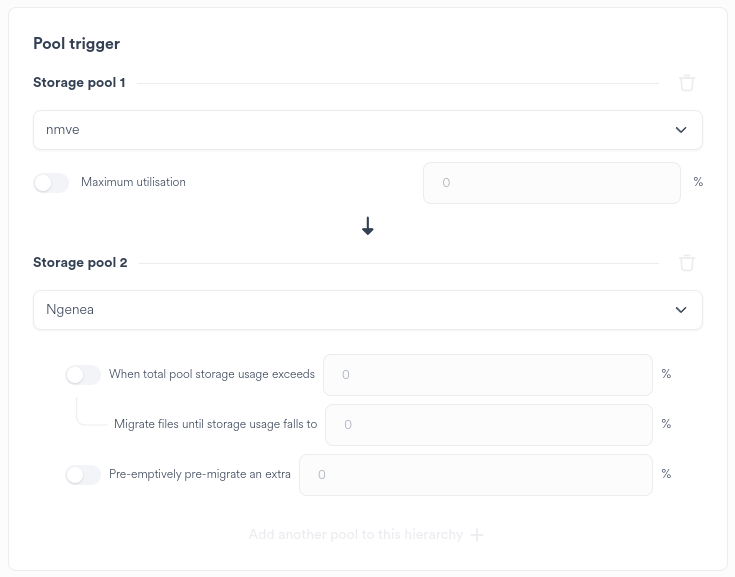
Ngenea to Pool
Data in an Ngenea Target is rehydrated to pool sas1 according to the Policy conditions.
When sas1 is configured as the migration target, the sas1 pool utilisation limit determines how much
data can be migrated. Data matching the policy conditions is selected for migration from Ngenea until the
sas1 pool reaches its configured maximum utilisation limit. If the utilisation target cannot be achieved,
a best-fit approach is applied.
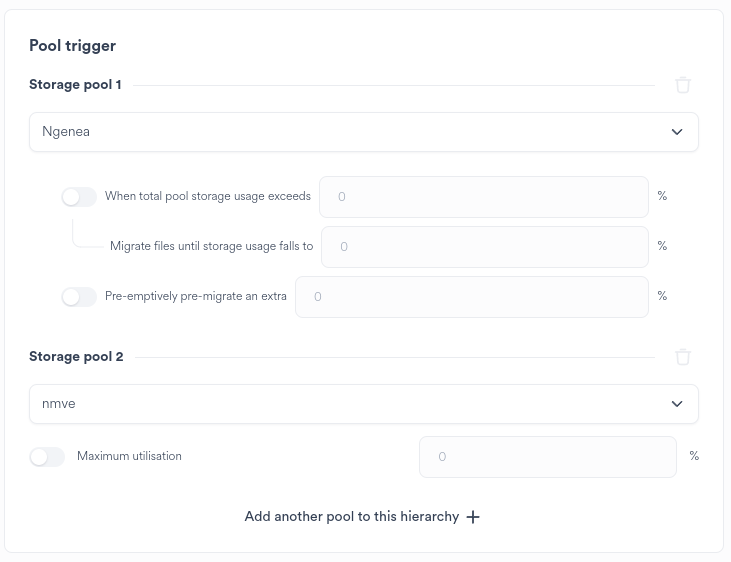
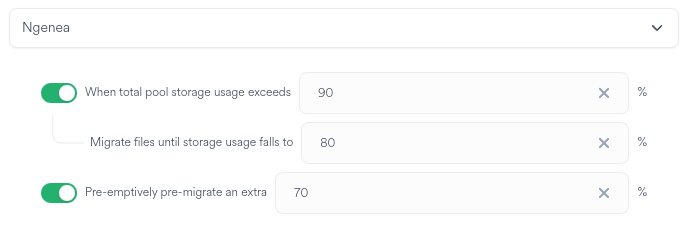
Ngenea Watermarks
Utilise Ngenea watermarks to provide finite control over data states during Policy processing.
The following example provides (assuming 93% utilisation):
Data will only be de-hydrated when the Storage Pool 1 (E.G.
sas1in the above example) is utilised over 90%13% of data residing on the pool will be de-hydrated, reducing utilisation to 80%
A further 10% of data residing on the pool will be Pre-Staged, ensuring that future de-hydrations process the first 10% of data faster as the data is already present in the Ngenea Target
Scope
The same Policy can run against one or more Spaces concurrently for a Site.
Policies are specific to a Site.
Select the Space or Spaces to run the Policy against on the Site.
Processing order
Select the processing order of the data.

|
Click the dropdown to select the processing order |
Conditions
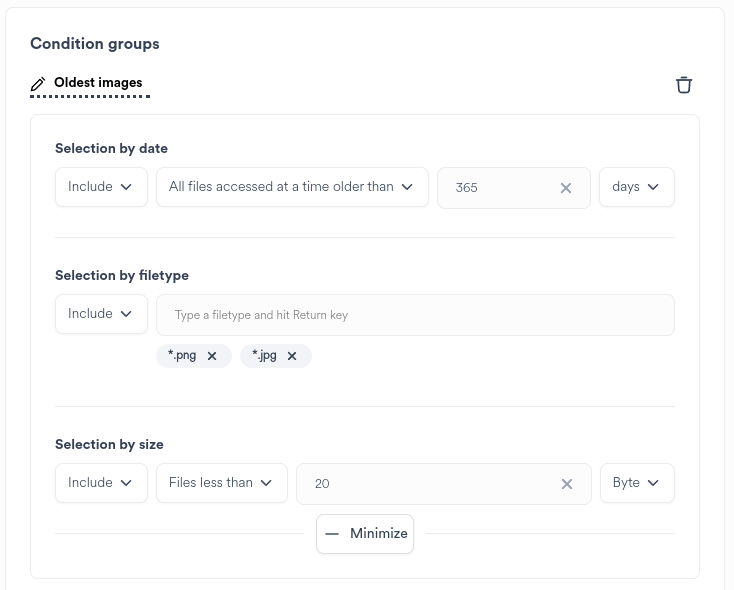
For more finite control of the data targeted, add a Condition group.
|
Click the |
Specify the criteria for the condition group as necessary
It is not required to specify all selections of the Condition group
Perform optional actions:
|
Click the Condition Group Edit button to name the Condition group |

|
Click the delete icon to remove the Condition group |
|
|
Click the |
Automation
To setup a regular scheduled Policy run, enable the Automate Schedule slider.
Determine the required frequency of the Policy run.
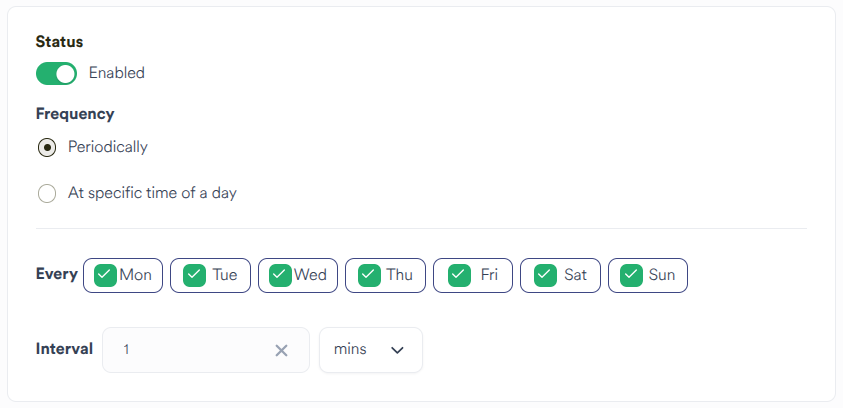
Choosing Periodically will ensure that the Policy will run on the next interval set.
E.G:
1 hour: The Policy will run on the next hour (12.00, 13.00)
15 mins: The Policy will run on the next 15 minute interval past the hour (15, 30, 45, 00)
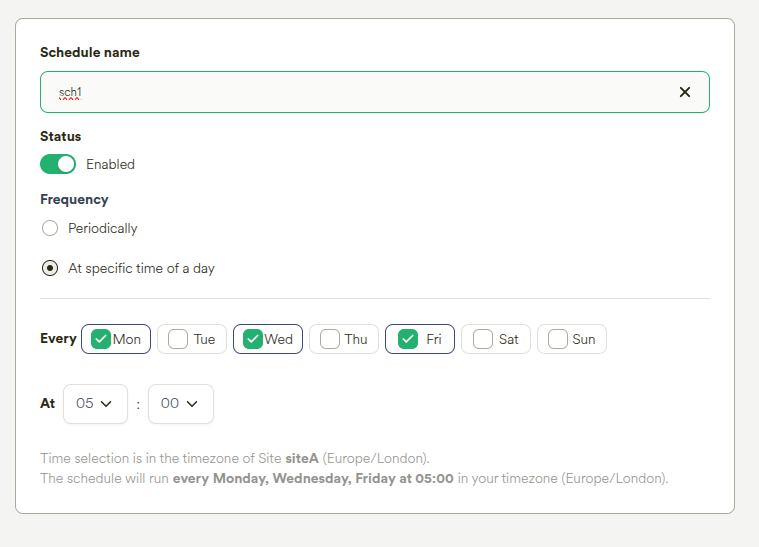
Choosing At Specific Time of A Day allows the Policy to be scheduled once per chosen day at a specific time of day.
Hint
The schedule time is set in the Site’s local timezone, but will be stored in the UTC timezone.
The schedule may be disabled at the point of creation by switching the Enabled toggle to Disabled.
Performance
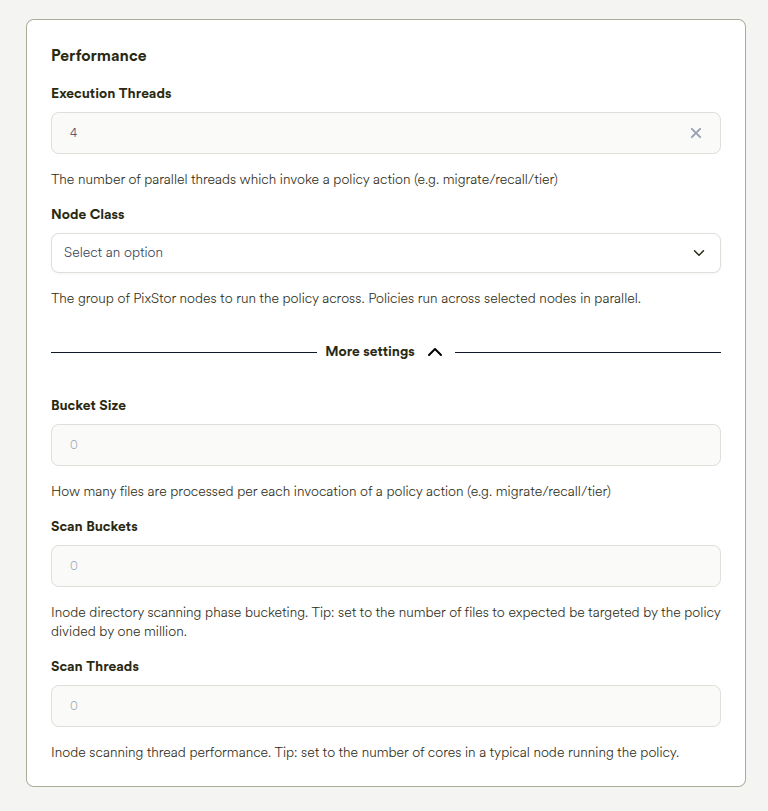
Choose the number of Threads to assign to the policy run.
Hint
The number of parallel threads which invoke a policy action (e.g. migrate/recall/tier)
The group of PixStor nodes to run the policy across. Policies run across selected nodes in parallel.
How many files are processed per each invocation of a policy action (e.g. migrate/recall/tier)
Inode directory scanning phase bucketing. Tip: set to the number of files to expected be targeted by the policy divided by one million.
Inode scanning thread performance. Tip: set to the number of cores in a typical node running the policy.
Summary
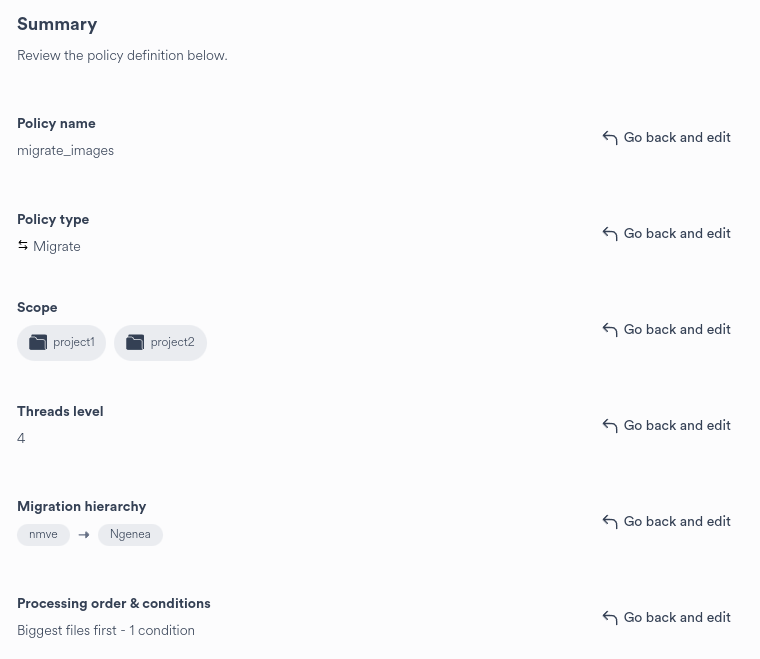
Upon completing the wizard steps a summary is presented:
|
|
Click the Finish & Create button to apply the changes displayed on the wizard summary page. |
Alternatively Go back and change the proposed configuration as required or close the wizard to cancel the creation of the Policy.
Editing a Policy
Important
This function can only be performed by a Hub Administrator.
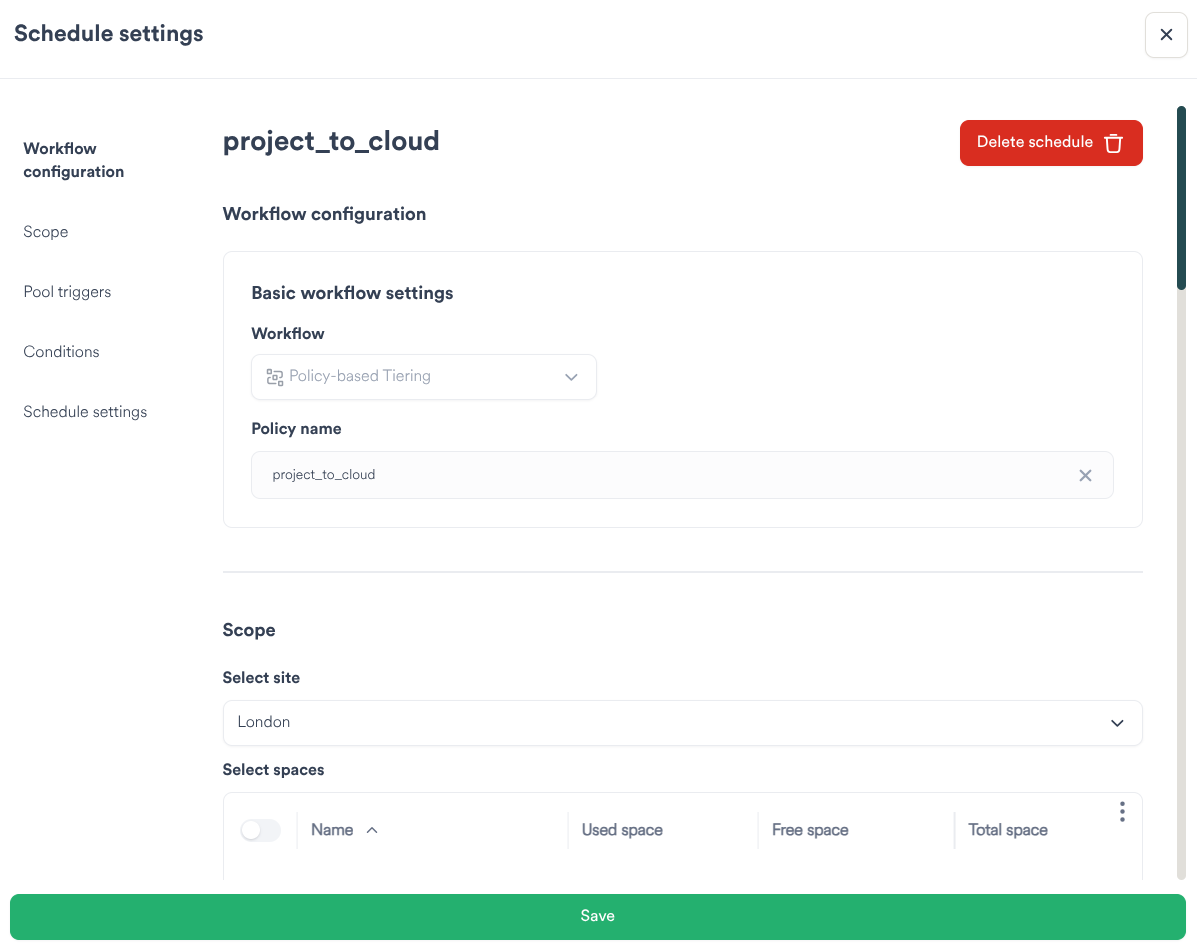
Clicking the Schedules button in the main menu bar displays the list of schedules:

|
Click the edit icon on the required Policy row to edit the Policy |
Modify the Policy settings as required. Refer to Adding a Policy for settings guidance.
Deleting a Policy
Important
This function can only be performed by a Hub Administrator.
Clicking the Schedules button in the main menu bar displays the list of Schedules:

|
Click the delete icon on the required Schedule row to delete the Policy |
A confirmation dialog is raised:
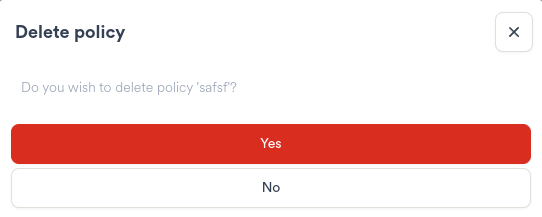
Click Yes to delete the Policy. This action is irreversable.
Alternately click no, or close the confirmation dialog.
Running a Policy
Policies are run either on a Schedule, as specified in the Wizard on creation or in the Schedule settings.
Alternatively, policies can be run on demand by clicking the Run button in the relevant row of the Action column on the Schedules page.
Important
Policies cannot be cancelled from the Hub UI once started
Progress feedback is not visible in the UI
Ensure the Policy is appropriate prior to running or scheduling

|
Click the Run button to manually start the Policy run |
A confirmation dialog is raised:
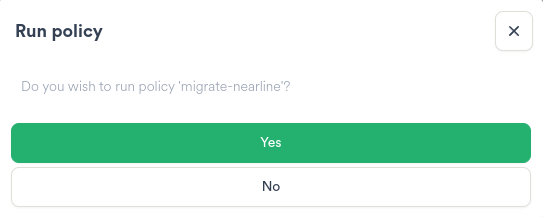
Click Yes to run the Policy.
Alternately click no, or close the confirmation dialog.
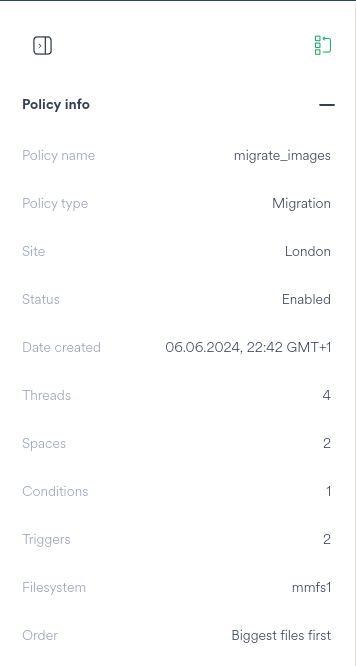
Running Policies are shown on the Jobs page, subject to the above constraints. I.E. no controls are available for Polices on the Jobs page.
Policies provide specific Policy information when the Job is selected in the Jobs Page.
Refer to doc:jobs for further Jobs guidance.
Cancelling a Policy
Presently there is no capability to cancel a running Policy via the Hub UI.
Running policies can be terminated by issuing a kill -9 to the mmapplypolicy process running on the relevant Ngenea node on the Site.
Upon terminating the running policy via the CLI, the Hub job will also terminate. The resultant Job state is (correctly) Failure - as the running policy was forcibly terminated.